Is Tiling a Bathroom Floor a Good DIY Project?
Tiling is one of the most satisfying DIY projects because the results are dramatic and long-lasting. A professional bathroom floor tile job costs $800–$2,500 for labor alone. Do it yourself and you pay only for materials — typically $150–$400 for a standard bathroom. The learning curve is real, but manageable with good preparation.
What You'll Need
- Ceramic or porcelain floor tiles (buy 10% extra for cuts and waste)
- Tile adhesive / thin-set mortar
- Tile grout (sanded for joints wider than 1/8 inch)
- Grout sealer
- Notched trowel (size depends on tile size — check adhesive packaging)
- Tile spacers (1/8 inch is standard)
- Tile cutter or wet saw
- Rubber mallet
- Grout float
- Large sponge and buckets
- Knee pads
- Level and chalk line
Step 1: Prepare the Subfloor
Your subfloor must be clean, flat, and structurally sound. Remove all old flooring, adhesive, and staples. Fill any low spots with floor leveling compound and sand down high spots. The subfloor should not flex when you walk on it — if it does, add another layer of 1/2-inch plywood before tiling.
For bathrooms, install cement backer board (like HardieBacker) over the subfloor for moisture resistance. Screw it down every 8 inches and tape the seams with alkali-resistant mesh tape and thin-set.
Step 2: Plan Your Layout
Never start tiling from a wall — walls are rarely perfectly straight. Instead, find the center of the room by snapping chalk lines from the midpoints of opposite walls. Where the lines intersect is your starting point.
Dry-lay a row of tiles from the center outward to each wall to preview the layout. Adjust the starting point so you don't end up with tiny slivers of tile at the edges — half-tiles or larger look much better than thin strips.
Step 3: Mix and Apply the Adhesive
Mix thin-set mortar to a peanut butter consistency — it should hold a peak when you pull the trowel away. Apply it to the floor with the smooth edge of your notched trowel, then comb through it with the notched edge at a 45-degree angle. Only cover an area you can tile in about 20 minutes before the adhesive skins over.
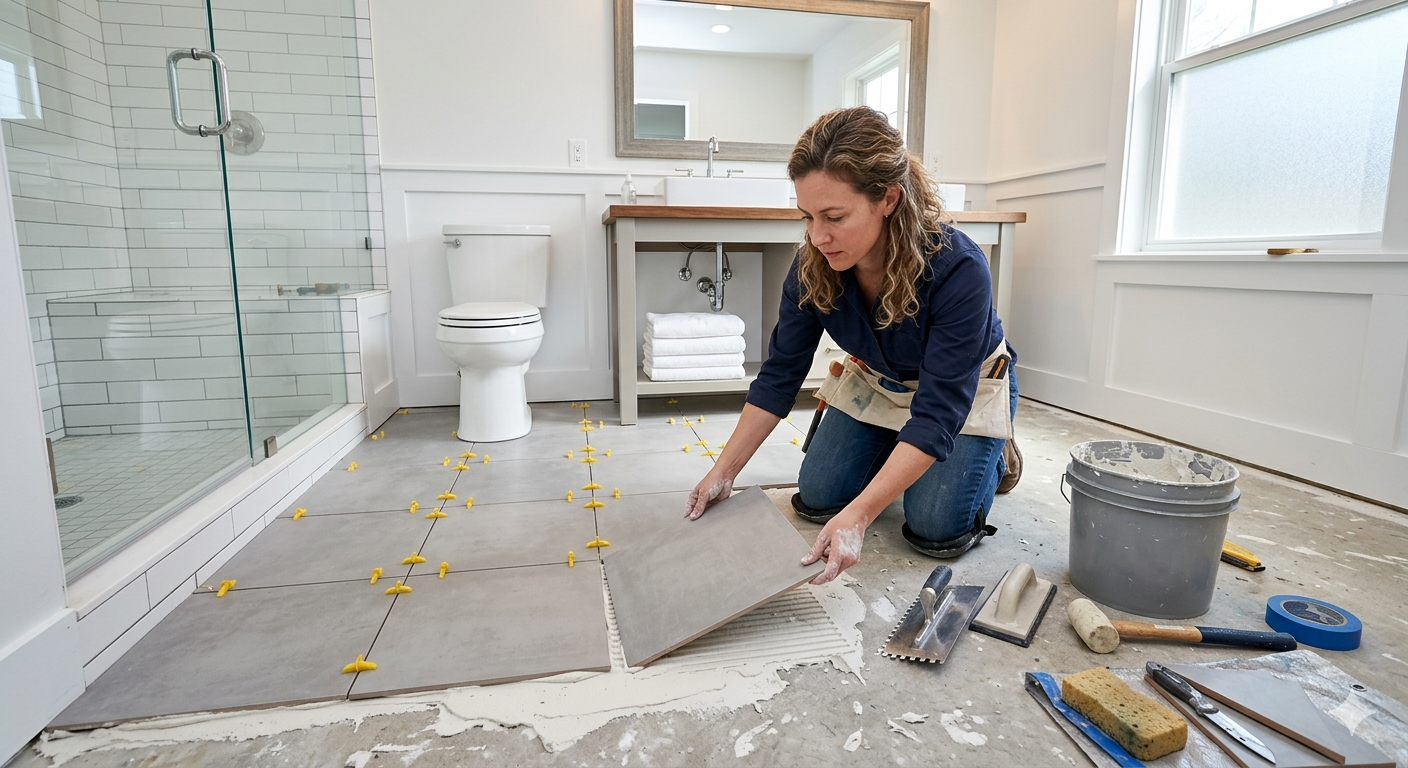
Step 4: Set the Tiles
Press each tile firmly into the adhesive with a slight twisting motion, then tap with a rubber mallet to bed it fully. Place tile spacers at each corner to maintain consistent grout joints. Use a level frequently — tiles must be flat and even with their neighbors. Remove any adhesive that squeezes into the grout joints before it dries.
Step 5: Cut Border Tiles
Measure each border tile individually — walls are rarely perfectly parallel. Score and snap cuts work for straight lines; a wet saw is needed for L-shapes and curves around toilets or pipes. Always wear safety glasses when cutting tile.
Step 6: Let the Adhesive Cure
Wait at least 24 hours before walking on the tile or grouting. Check your thin-set packaging — some require 48 hours. Do not rush this step or you risk shifting tiles that have not fully bonded.
Step 7: Apply Grout
Remove tile spacers before grouting. Mix grout to a thick paste and apply it diagonally across the tiles with a rubber grout float, forcing it into the joints. Work in sections of about 10 square feet. After 15–20 minutes, wipe away excess grout with a barely-damp sponge using a circular motion. Rinse the sponge frequently. A grout haze will remain — buff it off with a dry cloth after 24 hours.
Step 8: Seal the Grout
After the grout has cured for 72 hours, apply a penetrating grout sealer. This prevents staining and moisture absorption, which is critical in a bathroom. Reapply sealer annually. Do not seal epoxy grout — it does not require it.
Pro Tips
- Back-butter large tiles: Apply a thin layer of adhesive to the back of tiles larger than 12x12 for better coverage.
- Keep grout consistent: Mix the entire job from one bag to avoid color variation between batches.
- Work in quadrants: Complete one quadrant at a time rather than jumping around.
- Check for hollow spots: Tap each tile — a hollow sound means poor adhesive contact. Re-lay these tiles before the adhesive sets.