Can a Beginner Install a Ceiling Fan?
Yes — if you're replacing an existing light fixture, installing a ceiling fan is a straightforward DIY project that takes 1–2 hours. If you're adding a new circuit, you'll need an electrician. This guide covers the most common scenario: replacing an existing ceiling light with a ceiling fan in the same location.
Important safety note: Always turn off the circuit breaker before working on any electrical project. Never rely on just the wall switch — breakers ensure zero voltage at the wires.
What You'll Need
- Ceiling fan kit (includes motor, blades, and mounting hardware)
- Fan-rated ceiling box (if your existing box is not fan-rated)
- Non-contact voltage tester
- Screwdrivers (Phillips and flathead)
- Wire strippers
- Needle-nose pliers
- Ladder
- Wire nuts (usually included with fan)
- Electrical tape
Step 1: Turn Off Power at the Breaker
Go to your electrical panel and flip the breaker for the room to the OFF position. Use a non-contact voltage tester at the light switch to confirm there is no power. This is the most critical safety step — do not skip it.
Step 2: Remove the Existing Fixture
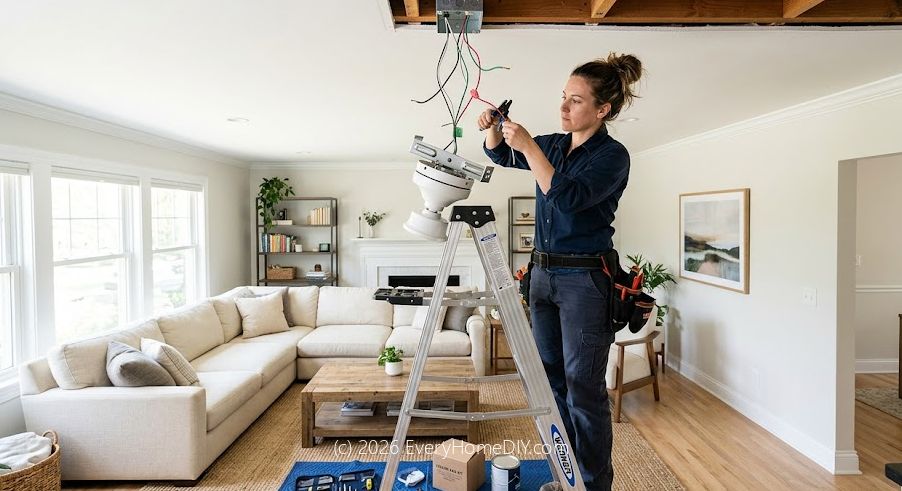
With the power confirmed off, unscrew and remove the old light fixture. You'll find wire connections inside — typically black (hot), white (neutral), and bare copper or green (ground). Unscrew the wire nuts and separate the connections. Note which wire is which before disconnecting.
Step 3: Check or Upgrade the Ceiling Box
Ceiling fans are heavier than light fixtures and they vibrate — they require a fan-rated electrical box that can support at least 35 lbs. Look for the words "acceptable for fan support" on the box. If your current box is not fan-rated, replace it with a fan-rated brace box that installs without cutting new holes in the ceiling.
Step 4: Assemble the Fan
Most ceiling fans ship disassembled. Attach the fan blades to the blade brackets, then attach the brackets to the motor following your fan's instruction manual. Pre-assemble as much as possible on the ground — it's much easier than working overhead.
Step 5: Mount the Bracket and Hang the Motor
Attach the mounting bracket (also called the mounting plate) to the ceiling box. Most fans use a ball-and-socket mount that lets the fan hang while you connect the wires — this is a crucial convenience feature that saves a lot of frustration.
Step 6: Connect the Wires
Match wire colors: black to black (or blue, for the fan light kit), white to white, and bare copper or green to green or bare copper ground. Twist the pairs together clockwise, screw on a wire nut, and tug to confirm the connection is secure. Wrap each connection with electrical tape for extra security.
If your wall has only one switch (no separate light and fan switches), connect both the black and blue fan wires to the black house wire. You'll control both with the included pull chains.
Step 7: Attach the Canopy and Blades
Slide the canopy up to cover the ceiling box and tighten the screws. Attach the blades to the motor if not already done. Make sure all blade screws are tight — loose blades cause wobbling and noise.
Step 8: Test It
Restore power at the breaker and test all fan speeds and the light. If the fan wobbles, use a balancing kit (usually included) — attach the small clip to a blade and move it until the wobble disappears, then apply the included weight to that spot permanently.
Troubleshooting
- Fan wobbles: Tighten all blade screws and use the balancing kit.
- Fan hums: Usually a speed controller issue. Replace the capacitor or use a fan-rated dimmer switch.
- Fan doesn't turn on: Check the breaker, wall switch, and re-verify wire connections.
- Light works, fan doesn't (or vice versa): Check the individual wire connections for the fan motor vs. light kit.